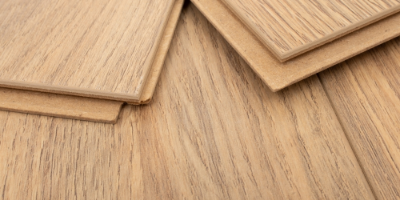
How To Install Parquet Flooring
If you’re looking for a beautiful floor to bring personality to your home, you can’t go wrong with parquet flooring. At first, parquet flooring can seem daunting to install, so if you’re concerned about trying it yourself, there are plenty of reputable fitters that can help. If you’re happy installing your own floor, however, check out our handy guide on how to install parquet flooring below!
Can I Install Parquet Flooring by Myself?
Yes, however it’s worth mentioning that it can be difficult so get hold of a professional if you aren’t feeling too confident.
However, if you want to avoid the cost to install parquet flooring, there are a few things that you can learn that will make DIY installation efficient, effective, and pain-free.
If you're looking for a place to start, our article contains step by step advice to set you on the right track.
Equipment for Installing Your Parquet Flooring
To install your parquet flooring, you’ll need some tools to help with the job:
- Tape measure
- Spirit Level
- Pencil
- Chalk
- Workbench or Sawhorse
- Combination Square
- Spacers
- Tapping Block
- Pull Bar
- Rubber Mallet
- Underlay and underlay tape (if needed)
- Handsaw, Electric Saw, Chop Saw or Stanley Knife (depending on flooring type)
- Chisel
- Drill
- Moisture Meter
- Adhesive or Trowel
- Safety Equipment (knee pads, safety goggles, dust masks, ear defenders)
How to Install Parquet Flooring: Step by Step
Before we begin, please bear in mind that this blog provides an overview of how to install a wood parquet floor. To find out about installing other types of flooring, check out our blog post on flooring installation methods.
Before You Begin
Whether your parquet flooring comes in solid blocks, tongue and groove, or with a click installation system, the most important thing you can do is be prepared.
If your renovation project requires the use of wet materials, it’s important to make sure they’ve dried before you begin preparing for installation. Plastering, masonry, and painting can alter the moisture content of a room which may affect the structural integrity of your parquet flooring.
You’ll also need to make sure you have everything you need for a successful installation. While some equipment may vary, tools such as tapping blocks, spacers, tape measures and saws will always be useful.
This guide will help you figure out which materials are needed for quick and easy fitting, depending on the method used.
1) Prepare Your Subfloor
If you want your new parquet flooring to be secure and stable, you’ll need to ensure that your subfloor is in a suitable condition.
Concrete, plywood, tiles and existing hardwood flooring are all ideal for laying flooring over, but each requires different preparation.
Below we’ve broken down each one to help you better understand the approach you need to take:
Concrete and Tiles
- First, thoroughly clean your subfloor, removing any debris, grease, or broken tiles. Dirt or remnants may prevent your parquet flooring from being level and reduce the effectiveness of the adhesives.
- Next, you’ll need to assess the moisture content of your concrete base. The presence of moisture can cause movement within the boards and prevent the adhesives from working effectively.
- Plastic Sheet Test: Cover your subfloor with plastic sheeting, sealing all sides with duct tape. Leave for 48-72 hours. If moisture is present, condensation will appear underneath the sheet.
- Calcium Chloride Test: Dry calcium chloride is poured into a container, weighed, and then sealed above the subfloor. The solution is then left for 72 hours and re-weighed. The difference in weight will indicate how much moisture is present.
- Handheld Moisture Meter: The device is held perpendicular to the concrete or tile subfloor, with pins protruding from the top. These pins are pushed into the subfloor, and a measurement is displayed on the screen.
- Plastic Sheet Test: Cover your subfloor with plastic sheeting, sealing all sides with duct tape. Leave for 48-72 hours. If moisture is present, condensation will appear underneath the sheet.
- If there’s moisture present within your subfloor, you’ll need to apply a layer of plywood or damp-proof membrane before your parquet flooring can be installed.
- Finally, you must level your subfloor. Deviations in height that measure above 2mm will cause instability and unevenness.
A belt sander can be used on concrete to reduce the height of any peaks, or a floor leveller can be applied. In this case, a latex bonding agent must be introduced to the subfloor first. This will make the floor leveller adhere properly.
Existing Hardwood Flooring
Unlike concrete, hardwood flooring can be prone to movement. While this is perfectly fine for day-to-day use, you’ll need to take steps to fix loose boards and stop your floor from squeaking if you wish to use this as a subfloor.
- Simply nail or screw each board in areas where movement can be felt underfoot.
- Don’t be afraid to put your flooring to the test. Jump up and down to locate any additional squeaks and add support where necessary.
- Once your existing hardwood flooring has been properly secured, thorough cleaning is required.
- Finally, floor leveller can be applied. Always follow the manufacturer’s instructions for best results.
Check out our blog post on subfloor preparation if you want to learn more.
2) Acclimatise Your Parquet Flooring
Part of learning how to install a wood parquet floor, and before beginning installation, is the process of acclimatising your parquet blocks.
We’ve discussed the importance of acclimatising wood flooring previously, but put simply, wood that hasn’t been acclimatised will be prone to warping and buckling and can be damaged if there are fluctuations in humidity.
Some minor changes will occur as the seasons change, but don’t worry, this is perfectly natural, and can’t be prevented.
- To ensure your parquet flooring doesn’t move once fitted, each board must be introduced into the room two weeks before installation.
- Check the humidity of the room beforehand. The area should have 40-60% humidity for optimal results, and should not exceed 23°C. Monitor humidity with a thermo-hygrometer, which are cheap and easy to find online.
- If the humidity in your installation space is unsuitable, you can reduce humidity by improving air circulation, or by placing a dehumidifier in the room.
- Once your room has reached the correct temperature and humidity, you can begin to store your parquet flooring.
- Stack the boards in small, ‘Jenga’ style piles. Make sure to place each pile at a distance from one another. This allows for sufficient air circulation, ensuring that every single piece can be acclimatised.
- Once the two-week period has finished, you’ll be ready to install your floor!
3) Mark and Measure
- Begin by measuring each wall, marking the centre point.
- If your room is not a square or rectangular shape, taking measurements may be trickier. However, our blog post on measuring a room for flooring should help you get quick and easy results.
- Extend a chalk line to the opposite wall, lift, and snap to mark a straight line. This will create a visible intersection at the centre of the room.
4) Starting the Installation
At this point, the installation process will vary depending on which method you are using. Fixed blocks, tongue and groove, and click fitting all require different steps, so make sure to check before installation.
Parquet patterns may also vary, so make sure you feel comfortable and confident with your chosen design before you begin installation.
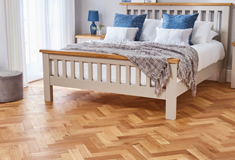
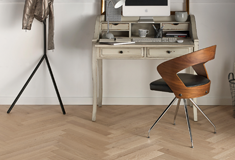
If you are installing herringbone, the blocks will have to be off-centred. This is to ensure that the characteristic zigzag remains central.
The direction of your pattern is down to personal preference. However, most parquet flooring is fitted parallel to the longest walls of the room.
In addition, remember to remove any old adhesives or debris from your parquet blocks. This is imperative if you’re using reclaimed boards, as left-over oils may cause issues with the installation process.
Don’t forget to leave a 15mm expansion gap at the base of each wall. To achieve a consistent width, always use a spacing piece.
This gap will compensate for the natural movement within your parquet flooring. You can cover this space with a skirting board after the installation process.
Fixed Block
- Once a midpoint and pattern has been established, start by laying one row of your parquet flooring without adhesive. This will ensure that the pattern is even and symmetrical. All patterns can easily become bowed or curved, so always refer to the central line.
- When you’re happy with how the pattern looks, it’s time to begin applying adhesive.
- Using a V-notched trowel, cover the desired area in a suitable glue, and begin securely bedding each block.
- Working one row at a time, firmly push each block into place, leaving no gaps.
- Leave each row to set before applying more glue. This will prevent your pattern from moving as you add more blocks.
Tongue & Groove
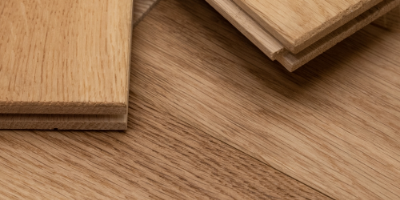
- Tongue & groove boards differ from fixed blocks. Each plank has been cut with a protruding ‘tongue’ and an indented ‘groove’. This design allows each board to fit together securely, instead of simply lying next to each other.
- Once in place, use a tapping block and rubber mallet to ensure connection between the planks.
- When using this method, remember to check the tongue and groove for any debris, and sand away if necessary. If the tongue does not fit seamlessly into the groove, unevenness may emerge on the surface.
- As with fixed blocks, begin installation in the middle of the room, fitting one row at a time.
- The tongue & groove design can be fixed directly to the subfloor, however, there are a number of other installation methods that can be used:
- Secret Nails: If you’re installing above a wooden subfloor, each board can be nailed. The nails are positioned at a 45-degree angle on the lip of each tongue. This can be achieved by hand, or with a specialised nail gun. Once the tongue has been placed inside a groove, the nails will be hidden.
- Floating: One of the simplest methods of installation. No additional nails and adhesives are required to fix the boards to the subfloor. Instead, a thin layer of PVA glue is applied to each tongue. Underlay is often required for comfort and support.
- Secret Nails: If you’re installing above a wooden subfloor, each board can be nailed. The nails are positioned at a 45-degree angle on the lip of each tongue. This can be achieved by hand, or with a specialised nail gun. Once the tongue has been placed inside a groove, the nails will be hidden.
Check out our blog post on floating flooring to learn more about this method.
Click Installation
Click installation is by far the easiest way to install parquet flooring.
- Similarly to tongue & groove boards, the click installation system allows each plank to fit together securely. However, the tongue is rounded on one side to lock into place without glue.
- To ensure symmetrical, even results, begin in the middle of the room, installing one row at a time.
- Use a tapping block and rubber mallet to ensure that each board has properly clicked into place.
- As click installation parquet flooring is not glued or nailed, apply a weight to the surface of the wood during installation. This will prevent the pattern moving as each board is locked into place.
- Remember to always consult your central line. Minor adjustments can be made, however this will become difficult as more boards are attached.
5) Cut the Edges
As your parquet flooring reaches each wall, you’ll need to make cuts to your boards.
Depending on which design you’ve chosen, you may want to add a border for decoration, or extend the pattern to the expansion gap.
If you’re using the tongue & groove or click installation system, the absence of a border may make completing the parquet design more difficult. This is because the small pieces will be tricky to fit securely into each groove.
If fixing to a subfloor, it’s recommended that the adhesive doesn’t reach beyond where you intend to make the cut. This will prevent the off-cut from being easily removed.
If installing a border, use a crowbar to pull the board away from the wall, and place a spacing block to maintain the size of the expansion gap.
6) Adding the Finishing Touches
- In some cases, your parquet flooring will require sanding to remove any damages, blemishes or imperfections.
- A finish of lacquer or oil must be applied to seal the boards, making them suitable for footfall. If your planks have been pre-finished during the manufacturing process, this shouldn’t be necessary. Instead, you’ll only need to clean your flooring. This should be done without using excess moisture, as this may damage the boards.
- To fit flooring around any pipes, first mark the position of the pipe in the board you’re using. Drill a hole in this position and make two angled cuts with a saw. These cuts should form a wedge from the edge of the board to the hole which can then be removed. Fit the board around the hole and then reattach this wedge with glue behind the pipe so the plank appears intact.
- For fitting around door frames, start by removing the door from the frame. Line up an offcut of flooring, along with a threshold bar stacked on top, to make sure it will fit underneath the architrave. If needed, use a handsaw and chisel to trim the bottom of the architrave to the correct height. You may also need to trim the bottom of the door before refitting.
- Use matching beading and thresholds to cover expansion gaps and blend the new floors in with your existing walls, making it look professional and seamless. Make sure not to attach any trims to the flooring itself or it may affect the expansion gaps.
- Any spare planks or cuttings should be kept in case repairs need to be made.
- If the expansion gap has been left too large and the skirting or moulding doesn’t cover it, you can use spare floorboards to cut strips using a hand saw and glue these strips into place.
We’d Love to See the Results!
Have you avoided the cost to install parquet flooring and done the job yourself? Share your experience with us!
Our team of flooring experts love to see a project come together and are on hand to offer guidance and advice.
Plus, remember to follow us on Instagram for the latest news and discussions, as well as exciting additions to our range of parquet flooring.

