


How to Lay Luxury Vinyl Tiles
Jump straight to:
> Tools You'll Need
> Your Installation Options
> Preparing to Fit Your Floor
> Installing Your Floor
> Finishing the Look
> Your Flooring is Finished!
or Download the guide as a PDF
Tools for Fitting Your Floor
To install these floors yourself you’ll need some tools to help with the job.
Have these at hand:
- Tape measure
- Spirit level
- Pencil
- Workbench or sawhorse
- Combination square
- Planks of flooring
- Spacers, Tapping block & Pull bar
- Rubber mallet
- Underlay and underlay tape (if needed)
- Handsaw or electric saw
- Chisel (for fitting around architrave)
- Drill (for covering pipework)
- Moisture meter – the correct type for your subfloor
- Beading or skirting boards (to finish the look)
- Safety precautions i.e. knee pads, safety goggles, dust masks, ear defenders
Your Installation Options
Note: This guide is based on single plank SPC vinyl flooring, so if you're fitting parquet, please take a look at our parquet-specific installation guide.
Floating floor
In a floating floor, the tiles are joined to each other, instead of to the subfloor. All of our SPC luxury vinyl tiles use this method due to their handy click-fit system. For this method, we’d advise you to have underlay installed and prepped. All of our SPC luxury vinyl tiles have an underlay already attached which is 100% waterproof and protects against mildew, mould, rot and bacteria. Just be sure to check your subfloor is clean and smooth before fitting your floor to make sure you get the best results.
Good to know
SPC Luxury Vinyl Tiles
This type of vinyl tile has a rigid core made from limestone that’s extremely tough and strong. They all have a click-joining system designed to be floated and include a 1mm IXPE underlay backing.
Preparing to Fit Your Floor
- Check the packs
Once the flooring arrives you should check one box to make sure you’re happy with the product. Some of our SPC vinyl flooring is designed to look just like real wood which means there may be some colour variation between the planks and batches. When you get to laying the floor you can make the most of these colour contrasts by mixing and matching planks with different shades to get a lovely natural look.
- Leave to acclimatise
We know it’s tempting to get stuck into installing your new flooring as soon as it arrives but it’s important to leave it for at least 24 – 48 hours in the room it’s going to be fitted in. This allows the floor to acclimatise and makes the vinyl less brittle. To do this, lay the packs on the floor or in stacks, ensuring they stay horizontal and equal weight is distributed across them all. Leave the planks in their packaging. Try to keep the room at the same temperature you’d usually have it (around 20 - 21°C should be alright) and don’t allow the flooring to be exposed to the elements. If you’re using underfloor heating, you’ll need to gradually increase the temperature so that the planks acclimatise to the heat. Your heating supplier will be able to advise you on this.
- Prepare the subfloor
Before you lay your new floor, you’ll need to remove the existing flooring, prepare the subfloor and ensure it is clean, dry and level. We recommend a concrete or wooden subfloor for the best result. Use a moisture meter to check the subfloor is dry enough before you start. If you do have a concrete subfloor, make sure it’s completely dry before installation. A damp-proof membrane should be installed on top of the subfloor to reduce the risk of moisture reaching the boards. You’ll need to do this to prevent the floors from expanding and buckling (many underlays now come with built-in damp-proof membranes). Any screws or nails in your subfloor should be fixed below the surface. This is so you can be sure they won’t puncture through the underlay. Remove any old adhesive from previous floors and vacuum the floor to pick up any excess dust or debris. - Plan the look
Think about the direction you’d like your planks to lie. As a general rule of thumb, lay the boards against the longest wall for the best effect. It might also be helpful to consider the shape of the room you’re going to refloor. For example, if it’s a square-shaped room, following the room’s light flow could create a beautiful effect. - And one last thing...
It’s best to fit your floor as the last thing you do in a renovation project. Work your way from the top of the room to the bottom so that once you’re ready for the floor to go in, there’s much less chance of damaging it. If you’re installing furniture that is extremely heavy then you might wish to glue the floor down with adhesive for extra stability.
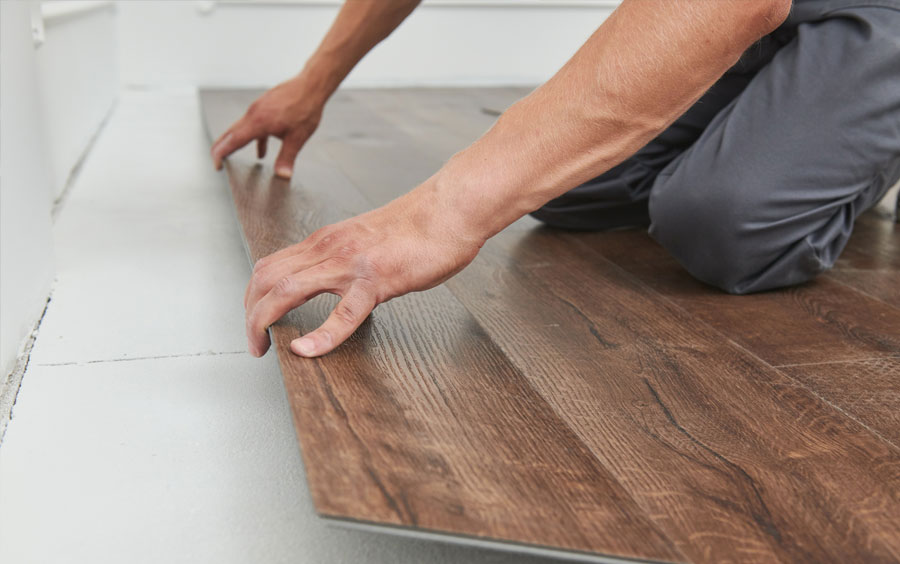
Installing Your Floor
Floating method
- Before laying the planks, measure the width of the final row. You can do this by dividing the total width of the room by the width of an individual plank. This will allow you to cut down the first row of planks to ensure the final row is at least 60mm wide.
- Place spacers between the first row and the walls to make an expansion gap of at least 2mm. If you’re using under floor heating, we recommend a minimum of 5mm.
- Lay the floor from left to right starting at the longest wall with the tongue part of the plank facing
the wall. - Stagger each plank by at least 30cm to create a natural look and a strong foundation. To do this, you’ll need to cut a plank at the end of each row. Ensure these planks are laid so that the cut side is facing the outside wall. Use the remainder of the previous plank to continue to stagger the joints from row to row.
- To fully connect the planks, cover the outer end with an offcut or a piece of card and use a rubber mallet to gently knock it until the planks sit flush against each other.
- After the first row, connect each plank to the previous row as well as the plank next to it. You can do this by clicking each joint into the gap of the plank in front, starting at a high angle and applying light pressure. After you hear a click, lower it flat on the floor. Repeat the previous step to make sure all planks are connected as closely as possible with no gaps.
- The last row might be tricky, but a pull bar and rubber mallet can help to create a tight fit.
Finishing the Look
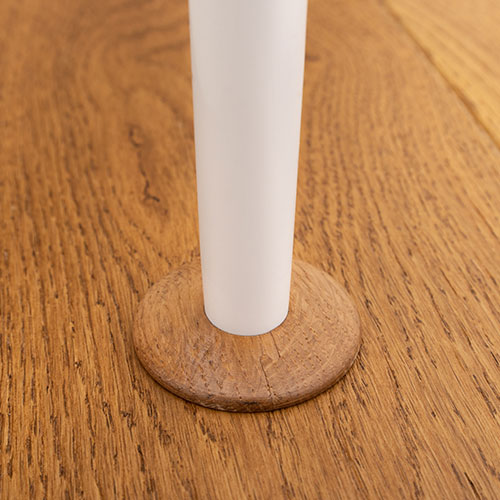
To fit your luxury vinyl tiles around any pipes, first mark the position of the pipe in the board you’re
using. Drill a hole in this position and make two angled cuts with a saw. These cuts should form a wedge
from the edge of the board to the hole which can then be removed. Fit the board around the hole and
then reattach this wedge with glue behind the pipe so the plank appears intact.
For fitting around door frames, start by removing the door from the frame. Line up an offcut of flooring along with a threshold bar stacked on top to make sure it will fit underneath the architrave. If needed, use a handsaw and chisel to trim the bottom of the architrave to the correct height. You may also need to trim the bottom of the door before refitting.
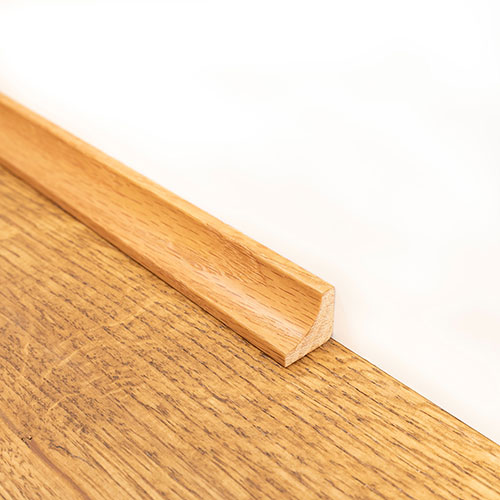
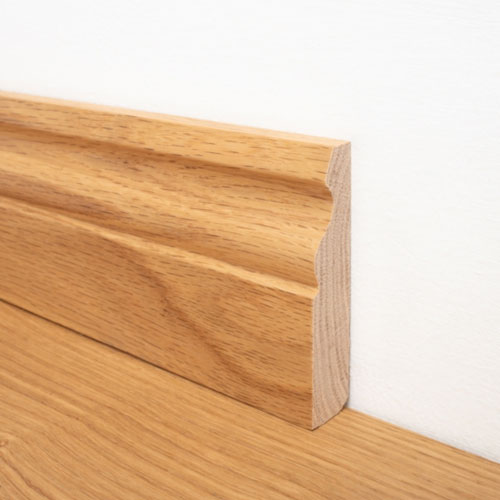
You can then use matching beading and thresholds to cover expansion gaps and blend the new floors in with your existing walls, making it look professional and seamless. Make sure not to attach any trims to the flooring itself or it may affect the expansion gaps.
Any spare planks or cuttings can be kept in case any repairs need to be made.
If the expansion gap has been left too large and the skirting or moulding doesn’t cover it, you can use
spare floorboards to cut strips using a hand saw and glue these strips into place.
Forgotten something? It's not too late to order these...
Your Flooring is Finished!
After putting in the finishing touches (like our range of beautiful radiator pipe covers, skirting boards, stair nosing, and door profiles), you can introduce your furniture, stand back and take it all in. You just fitted your very own Luxury Floor!
We’d love to see your accomplishments! So make sure you take plenty of pictures and post them online
@luxuryflooringfurnishings on Instagram. Tag us #MyLuxuryFloor
We hope you’re happy with your new Luxury Vinyl Tile Flooring but if you have any questions or issues, don’t hesitate to check out our advice centre or get in touch with our customer support team on 0333 577 0025.