Sanding Engineered Wood Floors: Can it be Done?
Sanding Engineered Wood Floors
Engineered wood flooring is one of our most popular flooring options. Many people choose this style as they want flooring that’s long lasting and provides a high-quality finish.
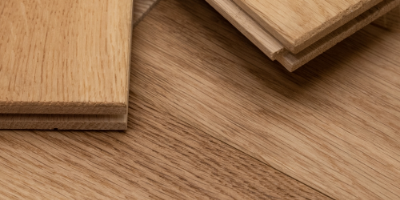
An attractive benefit of engineered wood floors is that unlike laminate and vinyl, they can be sanded and refinished at least once. This helps minimise the appearance of, or even completely remove scratches and dents, so you can achieve that newly installed look years after your flooring has been laid.
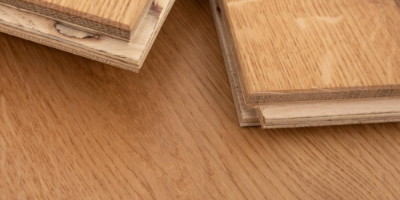
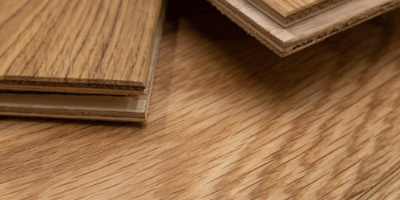
However, the number of times your floor can be refinished depends on the wear layer (the top layer of real wood) of your flooring.
It’s not recommended to refinish engineered wood flooring with a top layer that is less than 2mm.
Flooring with a wear layer of 2mm can be lightly sanded and buffed to erase minor scuffs.
Flooring with a thicker wear layer can be sanded, similarly to solid wood flooring, to minimise deeper scratches and dents in the plank. It can usually be sanded and refinished around five or six times.
Here, we guide you through the process of sanding engineered wood floors.
How to Sand Engineered Wood Floors
It can be easier to hire a professional to undertake this work, to ensure you get the desired effect. However, if you’re determined to learn how to sand engineered wood floors, here’s how:
1. Prepare your Flooring
Preparation is key to getting the job done right.
Firstly, empty the room of furniture and any decorative items. You might create dust and dirt throughout the sanding process so it’s a good idea to cover doors and windows to ensure any mess stays inside the room!
Hammer in any nails that may be showing and remove all trimmings from the edges of the floor. If possible, you should also remove any skirting boards and repair any missing or damaged boards.
Take the time to sweep and clean the floor thoroughly so you have the best possible surface to work with as you begin.
2. Begin Sanding
Using a hand sander and a coarse sandpaper (see our advice below on the right sandpaper grit to choose), start in one corner and sand in short, steady movements in the direction of the grain in the plank.
Moving in the direction of the grain is essential, as it avoids damaging and weakening the boards.
You may need to go back over the flooring again to ensure a smooth finish and that all the shine has gone.
Sanding must be done by hand, to avoid going through the wood layer and into the plywood layer below.
3. Clean Up the Dust
Clean the wood entirely of all dust before you apply the stain.
Soaking a cloth in mineral spirits and gently wiping down your flooring will ensure you’ve lifted all dust from the surface.
4. Apply a Stain
Starting in the corner, apply a thin layer of stain in the same direction as the grain. Allow it to soak into the wood for a minute or two, then wipe away with a paper towel and leave to dry for 24 hours.
5. Apply the Floor Gloss
Thinly coat the planks with the floor gloss, in the direction of the wood grain, ensuring that no bubbles appear. Leave to dry for another 24 hours.
6. Lightly Sand the Glossed Floor
To ensure a smooth finish, lightly sand the glossed floor by hand, and remove all the dust. Then you can reapply the gloss as above. To achieve the best results, this should be repeated so that the floor has been glossed three times in total.
If you follow all these steps correctly, your engineered floor should be picture perfect and have a new lease of life!
What Sandpaper Should be Used for Engineered Wood?
For a professional finish we recommend you use several grits of sandpaper.
Start with a coarse sandpaper, between 40 and 60 grit, to get rid of any imperfections. Consider marking the floor lightly with chalk or pencil so you can follow the progress of your sanding and avoid going over an area repeatedly.
Move up to medium-grit sandpaper, between 100 and 150 grit, to create a smooth, uniform surface.
For the final step, use a fine-grit sandpaper, between 180 and 220 grit. This will create the ideal surface to apply the gloss.
We’d love to see the results!
Have you attempted to sand and refinish your engineered wood flooring? Share your experience with us!
Our team of flooring experts are always excited to see a project come together and are on hand to offer suggestions and advice.
Plus, remember to follow us on Instagram for the latest news and discussions, as well as exciting additions to our range of engineered wood flooring!

